
My First 4 Weeks as a CSA Member (plus lots of recipes!)
Written by: IHF CSA Member & RCF Volunteer, Jamie Ousterout
I’ve enjoyed cooking since I was about 17 years old—basically from when my mother accused me of not knowing the first thing about cooking. I took that affront as a challenge and pleasantly surprised her when, the following week, I asked if I could host a dinner party for 6 of my high school friends. I don’t completely remember, but I think I made a risotto and a salad plus homemade ice cream…items my mom always liked to make for guests. After this successful experience, I was hooked on cooking. Over the years, cooking has become a stress reliever and creative outlet. I know lots of folks hate cooking, but I love it—mostly when I can cook for friends, family, my husband…or honestly, even myself (though I’m often tempted to order a Happy & Hale bowl or take-out Thai food instead.) So, even though I’ve enjoyed cooking for well over a decade, I had never taken the plunge and signed up for a CSA (“Community Supported Agriculture”) share of produce. I was always too intimidated by the sheer amount of produce and the inability to meal plan in advance (those who know me, know that I’m a major planner.) However, all of this changed when I signed up for Infinity Hundred Farms’ Spring CSA. I’ve been taking part in the CSA for 8 weeks now. And just like discovering cooking when I was 17 years old, I’m hooked.
Reasons for Signing up for a CSA
There are a few things I absolutely love about the spring CSA that Infinity Hundred Farms, by way of its nonprofit partner, Raleigh City Farm, is currently offering:
Infinity Hundred offers a manageable amount of produce that’s also varied. I’ve heard lots of stories about how the only thing you ever get from a CSA are pounds and pounds of beets or an inordinate amount of kale (I love both, but not by the pound.) Instead, Infinity Hundred offers small amounts of about 7 different items each week. I’m very happy to report that I’ve used literally all of my CSA share each week (with the exception of a few greens I forgot about…whoops!). Continue reading for recipe ideas and tips!
Everything from the CSA that I’ve enjoyed is incredibly fresh and delicious. And while Whole Foods has recently cut its prices, I do feel like I get a lot of value for the cost(it was $240 for 8 weeks, which translates to $30 per week).
The Infinity Hundred team, David McConnell, Founder & Principal Farmer, and Katie Breen, Director of Communications/Assistant Grower, are lovely people, and the Raleigh City Farm is an amazing organization. It makes me feel good that I’m supporting great individuals and their mission-driven non-profit partner, Raleigh City Farm—all while supporting local, sustainable agriculture (and cutting down on my carbon footprint.)
I really like the sense of community that I’ve enjoyed each week when I pick up my share on Wednesdays between 4-6 PM—a friendly wave or hug, a local celebrity sighting, grabbing a beer with another CSA member at local joint Pelagic Beer & Wine—it’s an awesome way to develop and enjoy a small, like-minded community within Raleigh.
I’ve hit on all the reasons for signing up for a CSA above. But I know what everyone really wants to know: how the heck do I use all of the great produce I get each week in a CSA pickup? See below for a few ideas, recipes (and photos) that will show you how I’ve used my produce over the first four weeks. The main ingredients you’ll need outside of the CSA are garlic and citrus (ideally lemons), some spices (mostly freshly ground pepper and Kosher salt) plus some protein (chicken, steak, shrimp/fish, tofu, etc.). Generally, when using all ingredients that are as fresh and delicious as this, less is absolutely more. I hope this helps you be more creative in the kitchen and inspires you to source more ingredients locally!
You can sign up for Infinity Hundred Farms’ year-round CSA by clicking here!
RECIPES
Week 1
The first week included an assortment of:
Spring field greens (random assortment of kale, chard, beet greens, mustard greens and baby collards)
Baby lettuce spring mix
Spring onions
Arugula microgreens
Tuscan herbs (flat Italian parsley and basil)
Baby bella mushrooms
Crunchy salad mix (Mung bean sprouts and French lentil sprouts)
I went all out the first night and used pretty much everything (except for the parsley and field greens) in one meal.
Salad
First, I made a delicious salad with the baby lettuce spring mix, microgreens, and crunchy salad mix. You can also use a mandolin or a food processor to thinly slice the radishes, though I often find that using a butcher knife easily and quickly does the trick. Make sure to wash and thoroughly dry (either with a salad spinner or paper towels) the greens and microgreens. Then, salt and pepper the greens. It’s important to individually season each component before mixing together. The super fresh produce needs very little in terms of a salad dressing. I recommend mixing the juice from one lemon with salt/pepper and a very small amount of Dijon mustard (a teaspoon or less) and olive oil (usually two parts olive oil to one part lemon works but I always eyeball it and taste as I go to get the right acidity). You can also add in any fresh herbs to this dressing or the salad itself…like fresh basil!
Wine Sautéed Mushrooms
Sauté the button mushrooms by first adding some butter (maybe a tablespoon) with a couple of minced (or pressed/grated) garlic cloves and chopped spring onions (just the white and light green parts—save the dark green parts for another recipe). Add salt and pepper, and once the onion and garlic are softened, add the thinly sliced mushrooms. Eventually, add some (maybe a half a cup to three quarters of a cup) of red wine and reduce until the mushrooms soak up the liquid (I used whatever wine I had on hand and poured a glass for myself while I was cooking…it’s the only way to cook, really). After the wine reduces and the mushrooms cook, add freshly chopped basil.
Protein: Chicken Thighs

I’ve so far found that the best way to plan for my CSA is just to make a nice salad and/or veggie side dish along with a key protein. On this occasion, I cooked up some boneless, skinless chicken thighs in some butter with salt and pepper until they came to temperature (165 degrees…use a meat thermometer!), and then I added some extra chopped basil on top along with the wine-sautéed mushrooms.
Week 2
This week, we were treated to:
Oyster and baby bella mushroom mix
Arugula
Baby hakurei turnips
Tender mustard greens
Baby green spring mix
Lemon thyme
Mint medley (mountain mint and spearmint)
Mint Ice Cream
I received an ice cream maker as a wedding gift, and it’s one of my most favorite kitchen items. I followed this great recipe from the Cookie+Kate blog using the spearmint. It was very simple and amazingly delicious…such a fun way to use mint!
Mushroom Omelettes
I couldn’t let the delicious mix of mushrooms go to waste this week. An easy way to use mushrooms is to make an omelet. Sauté the thinly sliced mushrooms in a small amount of butter (maybe a teaspoon-ish…feel free to use olive oil instead of butter). I also threw in the lemon thyme—great complement to the mushrooms! Then add in a couple of eggs that have been whisked well with salt and pepper. Pour over the mushrooms and cook up the eggs and fold over the mostly cooked eggs in half. You can also always sauté some spinach or other CSA greens along with the mushrooms to round out the omelet. This makes a great, quick breakfast (or dinner, if served with a nice side salad).
Week 3
This week brought a lovely mix of:
Mixed mustard greens
Spring mix
Pea shoots
Mushroom medley (cremini and shiitake)
Lacinato kale
Relaxation tea herbs (lemon balm and bee balm)
Spring onions
Iced Tea (Spiked or Not Spiked)

The summer after my senior year of high school, I remember getting herbs from a vendor at a local market in Taos, New Mexico and making an amazing chamomile mint tea over a campfire with two of my best friends. Every time I brew tea, I try to recreate the essence of that evening. For this recipe, I combined the lemon and bee balm tea from this week’s harvest with the previous week’s mountain mint (Pro Tip: Put all fresh herbs in a small glass of water to keep them fresh until you’re ready to use them…plus they make your kitchen look and smell beautiful!). For the tea, heat a large pot of water until it is just about boiling (but don’t let it boil!), and then take the pot off of the burner and throw in the (thoroughly cleaned) lemon and bee balm along with the mountain mint. Just let this sit and steep anywhere from 20 to 45 minutes (depending on how strongly flavored you like your tea). Taste along the way until you’re happy with the flavor. Let the tea cool and then pour into a pitcher, cover, and put into the refrigerator to cool down. When you’re ready to drink the tea, just pour over ice cubes. If you want a spiked version, you can add in some fresh lemon juice and a shot of vodka (I prefer Tito’s). It makes an incredibly refreshing drink for patio/porch sipping! In lieu of, or in addition to lemon and vodka, add sugar, Stevia, or a sweetener of your choice.
Salad
One of my most favorite salads to make is Dr. Weill’s Tuscan Kale Salad. I loved using my fresh CSA lacinato kale for this recipe…feel free to omit the bread crumbs (I usually do…you can also substitute in lightly toasted pine nuts, which are delicious).
Truffle Sautéed Mushrooms
While the wine-sautéed mushrooms I made during week one of my CSA were excellent (see above), I have a soft spot for anything involving truffles and mushrooms. You can buy a very small bottle of truffle olive oil from most grocery stores. Add this sparingly to any recipe for a gourmet treat. For these mushrooms, I warmed truffle olive oil (maybe a tablespoon) and added in a couple pressed/grated garlic cloves and then thinly sliced mushrooms. Cook on medium heat for a few minutes until the mushrooms soften (and add more truffle olive oil…or regular olive oil/butter so that the mushrooms don’t dry out!). As always, season with some salt and pepper, too.
Collard Greens
I’ve embraced many southern dishes since moving to North Carolina almost a decade ago. One is certainly collard greens. I loved using my mixed batch of greens from my CSA for this collard greens recipe that I’ve made many times. Really, what matters is that you use good bacon (vegetarians can of course omit the bacon). In addition to the recipe, I also like to add a splash of cider vinegar at the end of cooking just to give it more of a tanginess.
Protein: Flank Steak
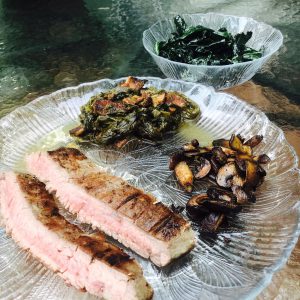
I generally keep various proteins in my freezer—this week I had a nice flank steak. Flank steak is comparatively less expensive than other steak cuts—here’s my favorite recipe for cooking it. Pro Tip: Flank steak also serves as an awesome leftover…either slice it with scrambled eggs the next morning or serve on top of a nice salad.
Week 4
This week brought an assortment of:
Chives
Root vegetable medley (Hakurei turnips, radishes and beets)
Butterhead lettuce
Adzuki bean sprouts
Baby carrots
Mixed field greens (mustard greens, red Russian kale, and collards)
Pea shoots
Salad

I channeled my inner James Beard-award winning chef, Ashley Christensen, when making this salad. If you haven’t had the salad (or “vinaigrette” as they call it) at Poole’s Diner, go now. It’s a delightful assortment of butter lettuce with a few other choice ingredients, a lovely vinaigrette and a mound (literally, a mound) of shaved parmesan. Using my butterhead lettuce from my Week 4 CSA, I added in the very thinly sliced beets and radishes. The colors were beautiful! Pro Tip: Slice the beets and radishes and then put in a bowl with a small amount of olive oil (maybe a teaspoon of olive oil and a generous sprinkle of salt…this helps to mellow out the bite of the radishes). I used a microplane (if you don’t have one, buy one now…seriously, it’s $12.95 on Amazon and worth every penny) to grate the baby carrots and a mound of parmesan cheese. I added the bean sprouts, too. Then make a very simple dressing with lemon juice and olive oil (throw in salt and pepper and any other herbs you fancy). I’m telling you, this will be the star of the meal. Growing up, my grandma used to say, “Look how pretty my dinner looks”—especially when she had a salad on her plate (her salad always had grated carrots). It’s always nice to evoke the past when cooking.
Protein: Shrimp Scampi
A simple shrimp dish is often a great accompaniment to salad or vegetables in the spring…especially when that dish is shrimp scampi. I was lucky to serve as the teacher’s assistant for a cooking class after my senior year of college (and before I entered the “real world”). I learned countless recipes, but the one I probably make most often is this shrimp scampi. Heat a large skillet over medium heat, add a tablespoon of butter and let cook until it starts to bubble and clarify a bit. Then add a pound of shrimp (fresh is best…especially from a local vendor like Local’s Oyster Bar, but honestly using a good frozen shrimp that’s thawed is just as good, too). Add salt and pepper and cook for about 2-3 minutes until pink. Add one large clove of garlic (pressed is fine…or you can grate with a microplane, which is even better). Then turn the shrimp over (do so quickly with tongs or a spatula) and cook for another ~2 minutes. You want all of the shrimp to be pink and cooked through but do NOT overcook. Remove the shrimp to a bowl and then add in 3 tablespoons of dry white wine to the warm skillet (as noted above, save a glass for the cook), and then 3 tablespoons of freshly squeezed lemon juice. Stir and cook over medium heat until the sauce thickens (about 1-2 minutes). Then add in an herb of your choice (traditional shrimp scampi calls for parsley but I love adding chives instead, especially from this week’s CSA) and melt down another tablespoon or so of butter. Then serve shrimp immediately with sauce poured on top. Pro Tip: Any shrimp leftovers are awesome for lunch the following day with the above salad.

Hash with Kielbasa

My husband and I tried the Keto diet earlier this year. While the nutritional experts are still out on the verdict of this diet, I saw some great benefits and really enjoyed the challenge of cooking without a lot of carbs and starches. One of the vegetables I rediscovered along this journey was the turnip. It’s a delightful replacement for the potato…with more of a kick and more heartiness. This Keto Hash with Kielbasa recipe has become one of my go-to recipes now. I was able to use up my CSA turnips plus I replaced the kale that the recipe calls for with my CSA mixed field greens. I do personally really like a bell pepper in the hash but you could replace with other CSA veggies instead. Also, the recipe calls for paprika, but it’s fantastic if you add some regular paprika and some smoked paprika (this is an awesome seasoning that I generally use anytime I see “paprika” in a recipe). I also omit the onion powder and double up on the garlic powder (or just use all fresh garlic/onions). And instead of a regular onion, you can use spring onions from your CSA. This is such a great weeknight dinner that comes together quickly and is really versatile.